Veritas NetBackup 8.1 windows 许可证+安装教程

Veritas NetBackup 8.1安装过程
只有真正实地基于具体的操作系统去安装,才能发现其中的各种陷阱,知识兔从没有像安装手册中写的那样顺利。
安装介质:
Veritas Net Backup 8.1.1 for Windows.iso序列号-见本文最后安装包中
建议以管理员身份运行;


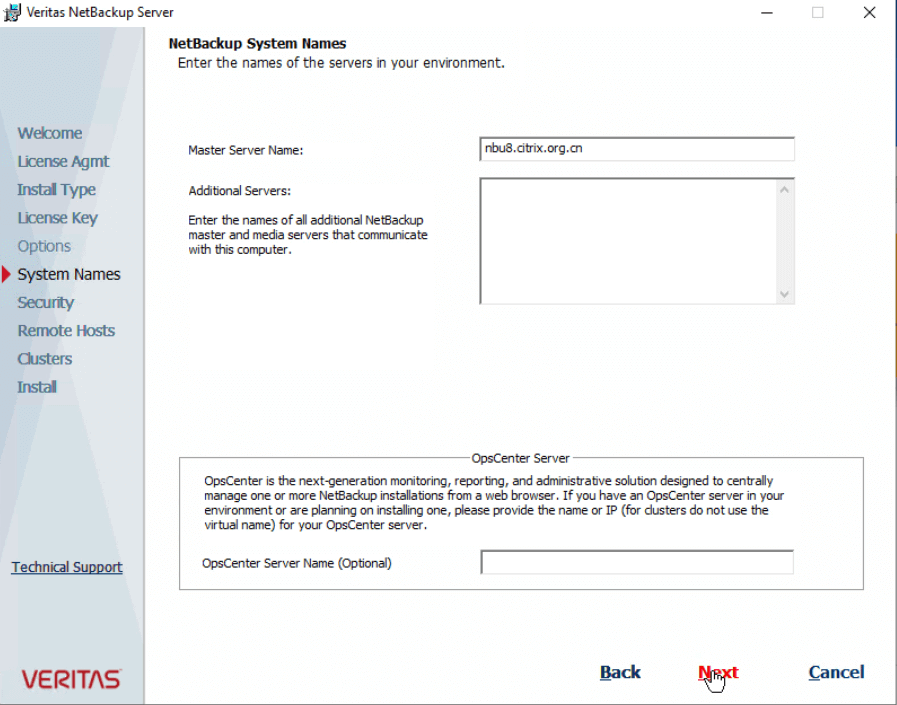
这里提示UAC没关闭,实际上已经关闭了,但安装程序还是报,说明有bug


此外还要修改本地安全策略;
https://www.veritas.com/content/support/en_US/article.100023872
Windows1. Create a local user accountC:\>net user nbwebsvc /add Note: If your master is clustered, then you must use a domain account. Domain account can be used in non-clustered environments. Note: User names on Windows systems must be 20 characters or less. Make sure that the password for the web user is set to never expire.2. Create a local group:C:\>net localgroup nbwebgrp /add Note: If your master is clustered, then you must use a domain account. Domain account can be used in non-clustered environments. 3. Make the user a member of the group:C:\>net localgroup nbwebgrp nbwebsvc /add4. Grant the Log on as a service right to the user:Go to Control Panel > Administrative Tools > Local Security PolicyUnder Security Settings, click Local Policies and then User Rights AssignmentRight-click on Log on as a service and select PropertiesAdd the local user. The default local user name is "nbwebsvc".Save your changes and close the "Log on as a service" Properties dialog.The installation of NetBackup Master Server will fail if any of these requirements are not met. On Windows, you will be asked to provide the password for the user account as part of the installation process. Note: You must use domain accounts in clustered environments on Windows.


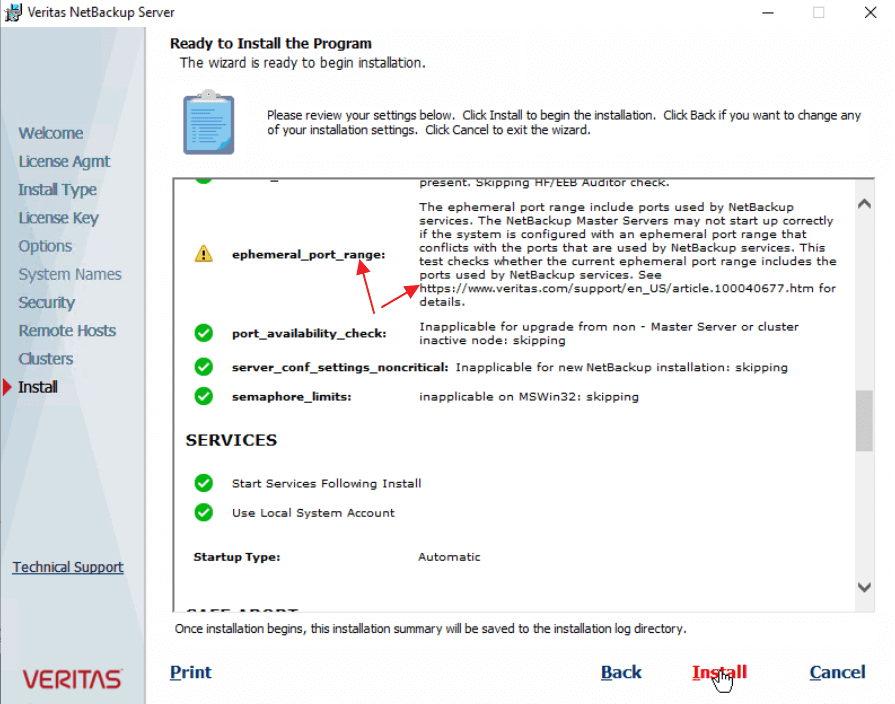
官方说明:https://www.veritas.com/support/en_US/article.100040677.htm//16383=65535-49152netsh int ipv4 set dynamicport udp start=49152 num=16383netsh int ipv4 set dynamicport tcp start=49152 num=16383netsh int ipv4 show dynamicport udpnetsh int ipv4 show dynamicport tcp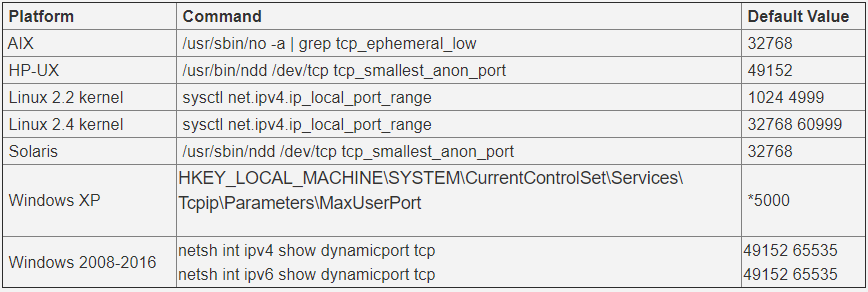

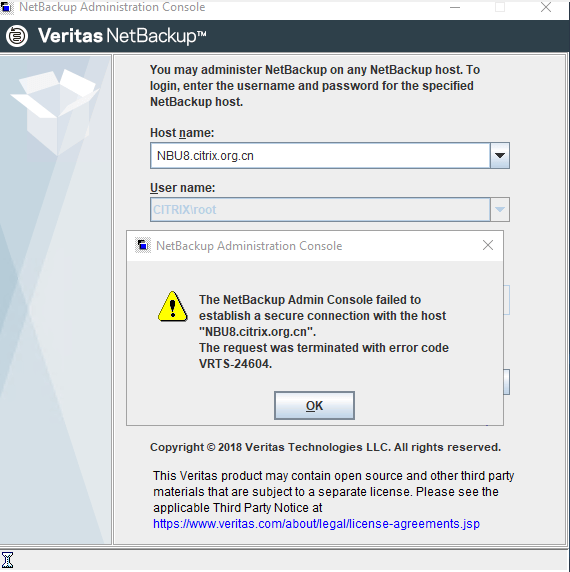
https://www.veritas.com/support/en_US/article.100045901
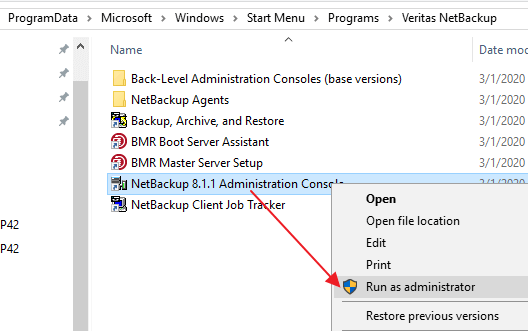
ProblemUnable to connect to master server when launching NetBackup Administration console (java) from remote Windows system.Error MessageThe NetBackup Admin Console failed to establish a secure connection with the host "master.xyz.com"The request was terminated with error code VRTS-24604.CauseMicrosoft Windows User Account Control (UAC) may prevent proper loading of the NetBackup Administration Console.SolutionWhen opening the NetBackup 8.x.x Administration Console do the following:- Right-click on the icon "NetBackup 8.x.x Administration Console"- Select "Run as administrator"- Complete the log in when prompted for the Host name, User name, and Password.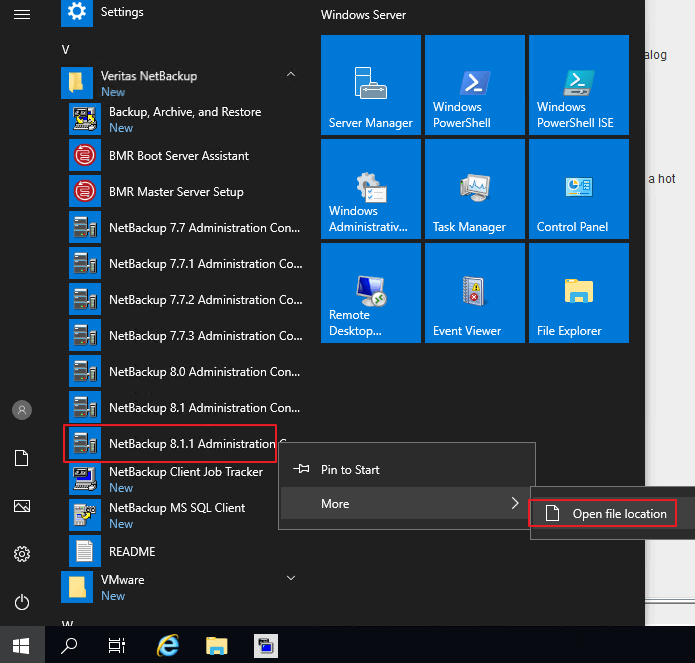
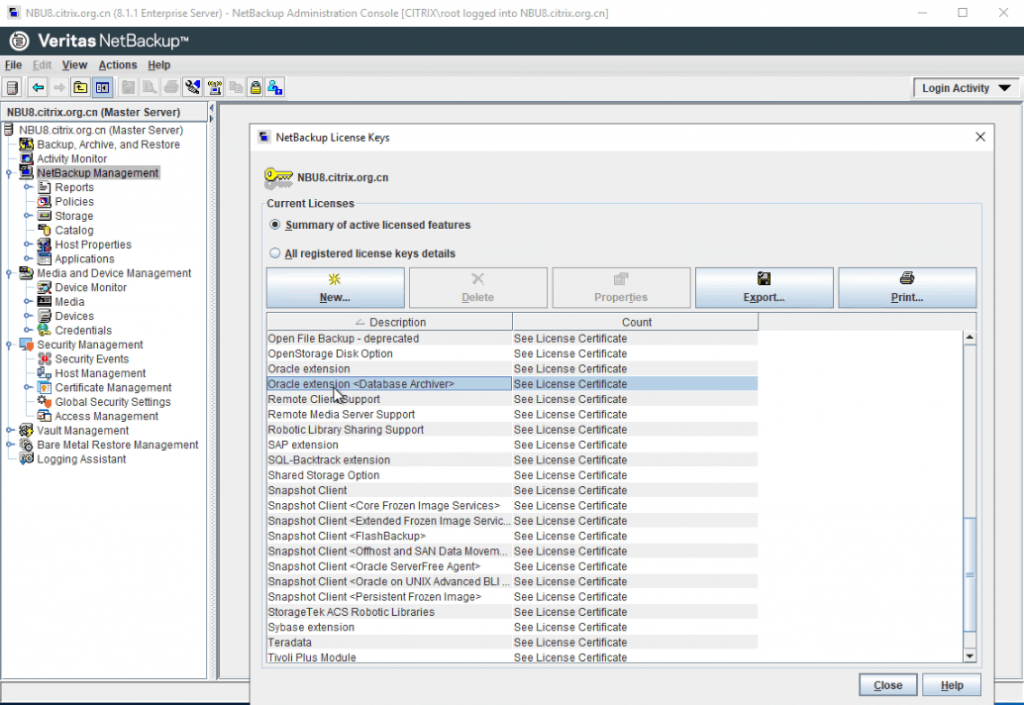
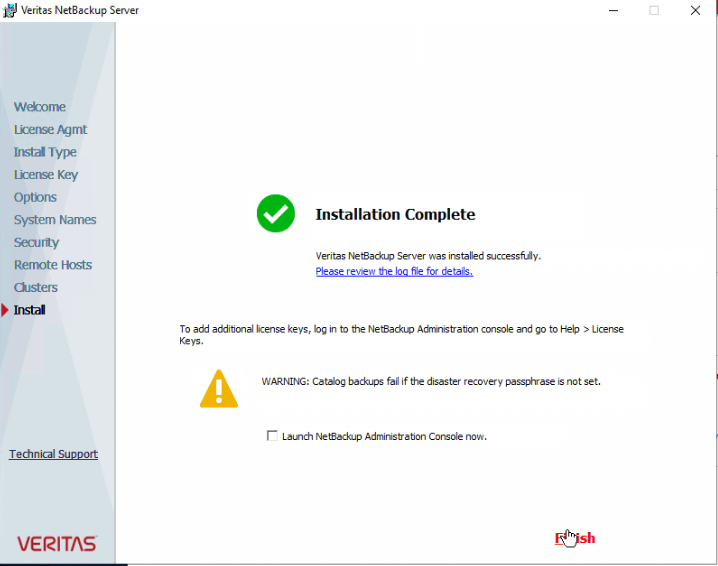
NBU现在都统一到Java界面了,那Windows和Linux下的操作体验就完全一样了,记得NBU的备份一体机就是基于SUSE部署Linux版NBU。
相关文件下载
下载仅供下载体验和测试学习,不得商用和正当使用。