Centos7.4+jira8.0.2 安装与破解教程
目录
1、安装java环境
注意:jira需要oracle的java,默认的openjdk是不行的
下载jdk-8u201-linux-x64.rpm,然后知识兔上传到/mnt
https://pan.baidu.com/s/1LekS9L5SiNYm4fOc7Vv4DA
提取码:1ozh
安装
rpm -ivh jdk-8u201-linux-x64.rpm# 查看jdk是否安装成功
java -version2、安装mariadb
yum -y install mariadb mariadb-server
2.1启动mysql并设置开机自启
systemctl start mariadbsystemctl enable mariadb2.2设置mysql初始密码并创建配置数据库
mysql_secure_installation首先是设置密码,会提示先输入密码Enter current password for root (enter fornone):<–初次运行直接回车设置密码Set root password? [Y/n] <– 是否设置root用户密码,知识兔输入y并回车或直接回车New password: <– 设置root用户的密码Re-enter new password: <– 再输入一次你设置的密码其他配置Remove anonymous users? [Y/n] <– 是否删除匿名用户,回车Disallow root login remotely? [Y/n] <–是否禁止root远程登录,回车,Remove test database and access to it?[Y/n] <– 是否删除test数据库,回车Reload privilege tables now? [Y/n] <– 是否重新加载权限表,回车退出重新登录okmysql配置文件修改:
vi /etc/my.cnf修改如下
[mysqld]datadir=/var/lib/mysqlsocket=/var/lib/mysql/mysql.sockinit_connect='SET collation_connection =utf8_unicode_ci'init_connect='SET NAMES utf8'character-set-server=utf8collation-server=utf8_unicode_ciskip-character-set-client-handshakemax_allowed_packet=256Mtransaction-isolation=READ-COMMITTED# Disabling symbolic-links is recommended to prevent assorted security riskssymbolic-links=0# Settings user and group are ignored when systemd is used.# If you need to run mysqld under a different user or group,# customize your systemd unit file for mariadb according to the# instructions in http://fedoraproject.org/wiki/Systemd[client]default-character-set=utf8[mysqld_safe]log-error=/var/log/mariadb/mariadb.logpid-file=/var/run/mariadb/mariadb.pid## include all files from the config directory#!includedir /etc/my.cnf.d创建数据库(登录进mysql执行)
create database jira default character set utf8 collate utf8_bin;grant all on jira.* to 'jira@’%' identified by 'jira123456'; flush privileges;3、安装jira
需要下载那个版本,将对应版本号改一下即可。
(1)下载jira安装包至本地,执行
[root@localhost ~]# chmod 777 atlassian-jira-software-8.0.2-x64.bin[root@localhost ~]# ./atlassian-jira-software-8.0.2-x64.bin(2)安装结束后选择不要启动服务(破解补丁最下面)
将破解补丁atlassian-extras-3.2.jar 和mysql驱动 mysql-connector-java-5.1.42.jar 覆盖到此目录:/opt/atlassian/jira/atlassian-jira/WEB-INF/lib
(3)重新启动jira
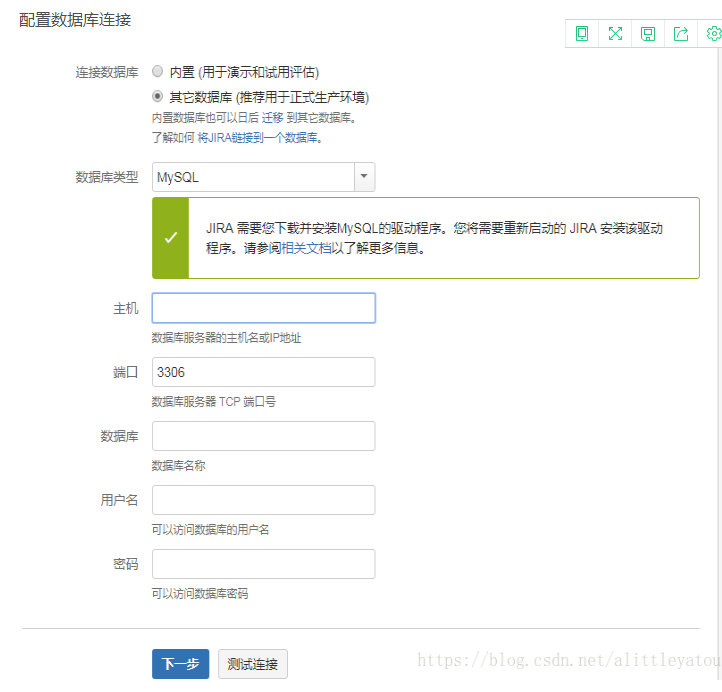
/etc/init.d/jira start(4)页面上打开http://IP:8080进行设置,
mysql数据库选择5.6主机名:ip数据库名:jira密码:jira123456测试正常后,进入授权码页面,https://my.atlassian.com/product选择jira soft 生产授权码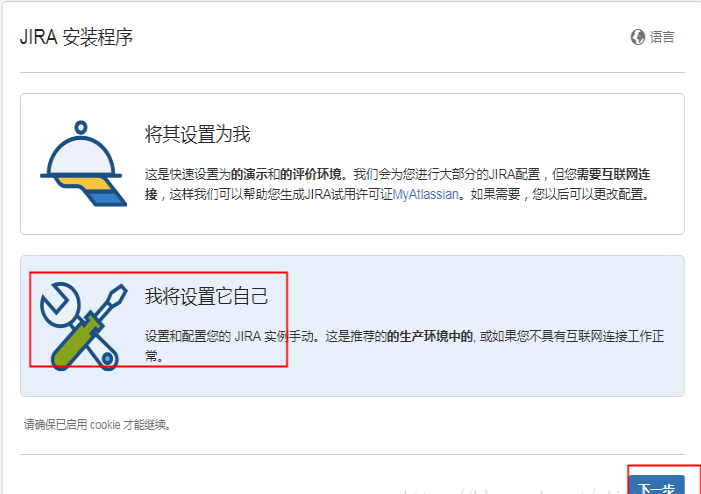
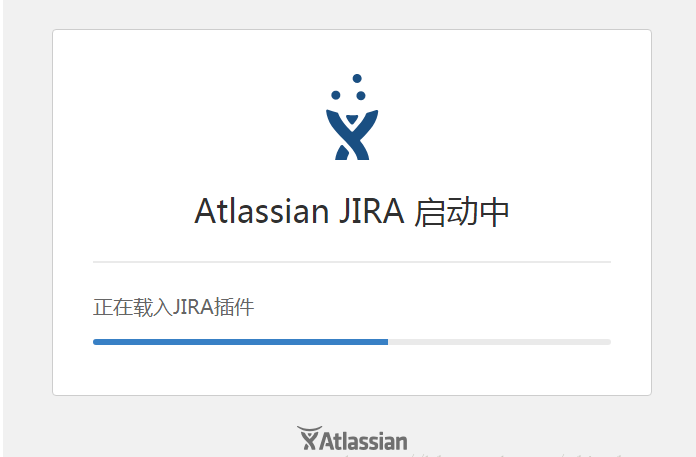
连接完成系统配置中,稍等几分钟
(5)安装完成,破解完成;授权时间为无限
访问地址:http://IP:8080
相关文件下载
下载仅供下载体验和测试学习,不得商用和正当使用。